XT600E Smoking/Low Compression/Oil Consumption

O

old trials guy

Guest
I think everyone is providing wonderful advice but I think the next step is to properly measure the parts. This is a high tolerance, high performance engine. The piston might well be oval ground and you need to know how and where to measure and as sparkle suggests, measuring ring end gap is only a small part of assessing what needs replacement. Ring end gap is usually performed using a new set of rings as a quick and dirty method of assessing cylinder wear. Cylinders do not wear symetrically, they will typically become tapered over time, pistons wear as well. As far as guides go, if you don't have the tools or expertise you are only guessing. I would do as Island Hopper suggests and Mongoose is about as good as it gets for Yamahas. Once you know what you are up against you can make sound decisions on what or what doesn't need to be replaced. Also agree that the valves and seats should be left to a pro to get the proper angles.

My 2 cents and as always good luck with your repairs.

otg
 

pursang

New member
I agree it's time to box up the parts and have a machine shop advise me as to what the options are. I'll be moving onto the carb next so I'll start a seperate thread, one more question before this thread sits idle while the machinists go to work, I'm still concerned about the oil consumption issue, Shuswap mentioned how wet the rings were and maby the oil consumption was related to a crankcase ventilation problem, how do I check this ? I noticed one hose leading from the cases right in front of the starter and entering the airbox, that hose was clear with no obstructions, is there anything else to check or do you think the stuck rings and hardened valve seals were cause for the high oil consumption ?
 

sagot

Member
You will need a "Diamond" hone to cut the Nikasil. A ball hone works OK to just "score" the coating.
I think most of your problems are in the valves.
Check the valve to guide clearance!!!
 

pursang

New member
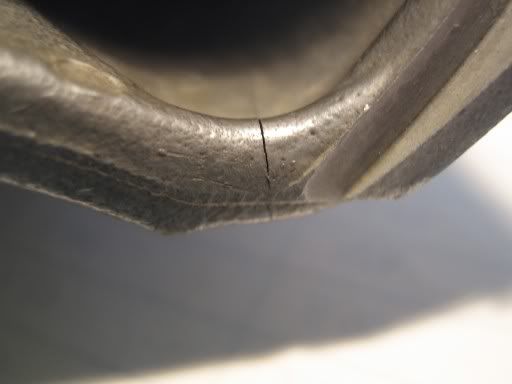
While looking for a part number I found this hairline crack on the piston skirt, I don't feel so bad now she didn't fire up this spring.

IMG_0839512x384.jpg
 

pursang

New member
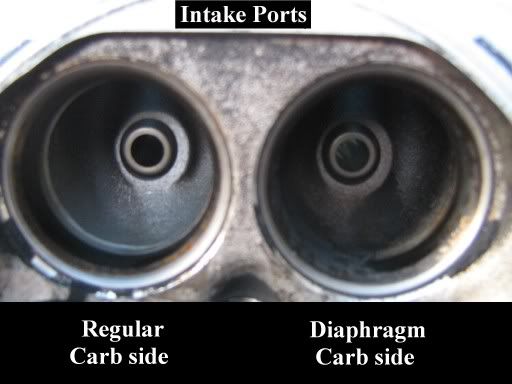
I noticed one of the intake tracts was noticably dirtier than the other.
IMG_0612a512x384.jpg

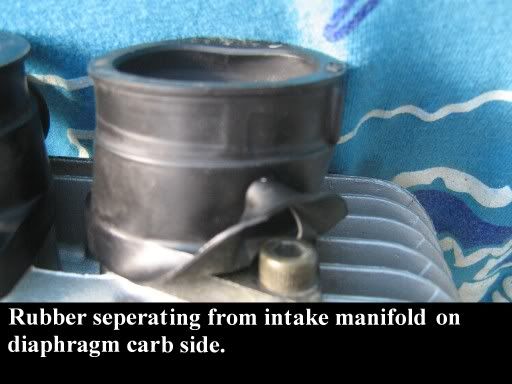
This could be one of the reasons, the rubber is losing it's bond on the flat part of the aluminum intake manifold, I could also feel movement on the round section which leads into the cylinder.
IMG_0615a512x384.jpg
 

Sparkle

New member
Hi pursang:
Very nice pictures.

According to your earlier measurements with ring-gap, your rings were toast. The diameter was
reduced so they wouldn't make a good seal against the bore, and this along with the large ring
end-gap would allow heavy blow-by into the crankcase. Oil would be burned in the combustion
chamber because the rings wouldn't wipe the oil properly, but also through the carbs because of
crank-case blowby. With this amount of oil being burned there's bound to be lots of oil and
carbon on the valves and intake ports.

This oil residue probably wouldn't be distributed equally between one side and the other because
of the position of the vent pipe, and because the carbs are not equal in their activity.

Obviously it would be good to replace the rubber intake ring but the pic shows it was probably sealing okay. Generally your engine looks
like it's in very good shape and my guess is all your problems will be solved with a standard 'top-end' rebuild including a rebore, piston and rings and a professional valve grind.

shots in the dark.

Sparkle
 

Shuswap

Member
Hi pursang:
Very nice pictures.

According to your earlier measurements with ring-gap, your rings were toast. The diameter was
reduced so they wouldn't make a good seal against the bore, and this along with the large ring
end-gap would allow heavy blow-by into the crankcase. Oil would be burned in the combustion
chamber because the rings wouldn't wipe the oil properly, but also through the carbs because of
crank-case blowby. With this amount of oil being burned there's bound to be lots of oil and
carbon on the valves and intake ports.

This oil residue probably wouldn't be distributed equally between one side and the other because
of the position of the vent pipe, and because the carbs are not equal in their activity.

Obviously it would be good to replace the rubber intake ring but the pic shows it was probably sealing okay. Generally your engine looks
like it's in very good shape and my guess is all your problems will be solved with a standard 'top-end' rebuild including a rebore, piston and rings and a professional valve grind.

shots in the dark.

Sparkle

+1 on Sparkles comments above.

You REALLY don't want an air leak at the intake boot/manifold, so if it isn't really good...either replace or repair.
 

pursang

New member
Thanks guys, about a third of the rubber on the round barrel section is loose, I can't see much but when I move the rubber I can feel it's gritty inside, I'll blow it out real good, clean it with soapy water, let it dry and seal it up with silicone, if it doesn't seal tight I'll replace it.

It's always interesting all the different factors involved in what's going on inside an engine, along with everything you mentioned Sparkle the engine was also running with tight intake valves, you'll be amazed at all the carbon and crud being splashed back into the carbs, one butterfly valve looks like someone held it behind a slick and did a smoke show ! I'll post up some pics of what I found in the carbs.
 

Shuswap

Member
Not sure silicone is the answer with your rubber manifold. Have you tried Goop glue? I haven't used it in this application, but I have in many others and it will stick to ANYTHING, if clean. My basic complaint with silicone is lack of, or inconsistent, adhesion to surfaces.

With Goop, it's nasty smelling, use it only in a very well-ventilated area....it starts to cure VERY quickly, so get everything ready before you open the cap. Wear snug-fitting chemical-resistant gloves, use your finger. USE LOTS....more than you think....it will condense and shrink. It's curing right from the get-go, so you have very limited work time.

Get the cap back on as soon as you can!

Leave it for a few days in a warm place, somewhere you don't have to breathe the fumes it'll give off.

I've used it to repair huge cracks in saddlebags..... put it on thick, it shrinks to almost invisible and has held up for many many years, carrying ridiculous loads of groceries home.

Juz my 2 cents....and I'm not 100% certain it will work with this manifold of yours, but it would be my 1st choice.
 
Last edited:

pursang

New member
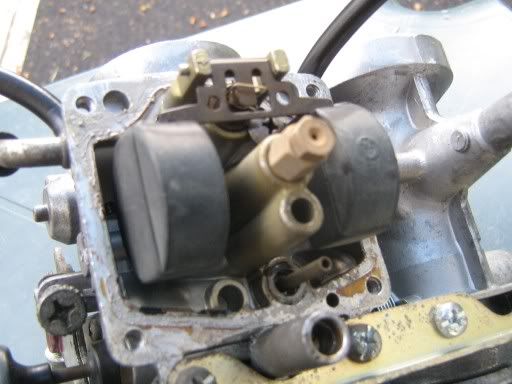
I can't say for sure if the condition of these carbs is after 60.000km or less, I was told the bike went in for carb work but the extent of it may have only been to pop the float bowl off.
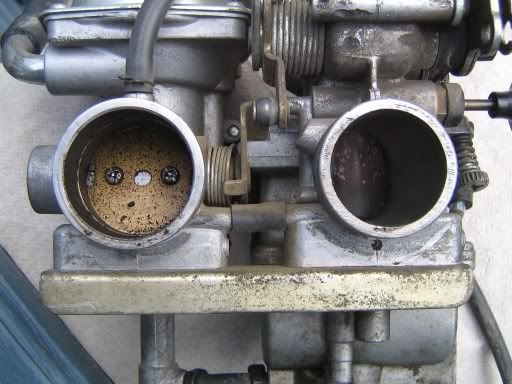
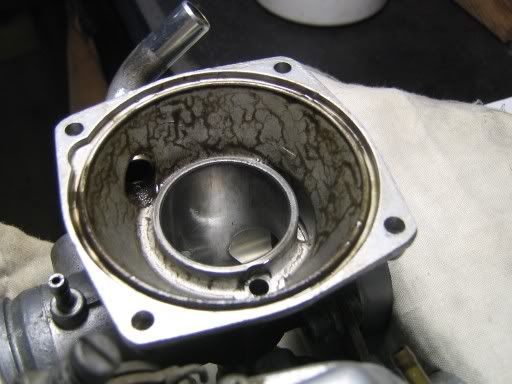
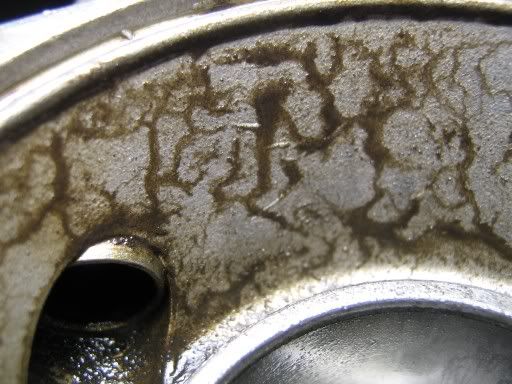
Cylinder head side of the carbs.
IMG_0477512x384.jpg

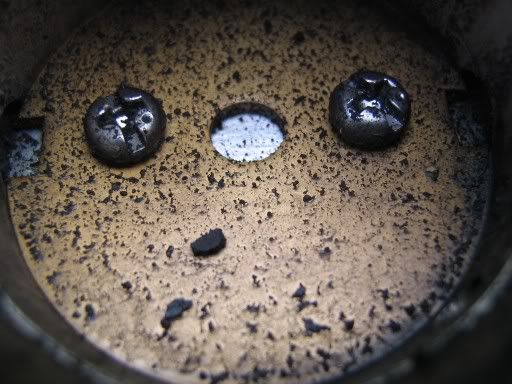
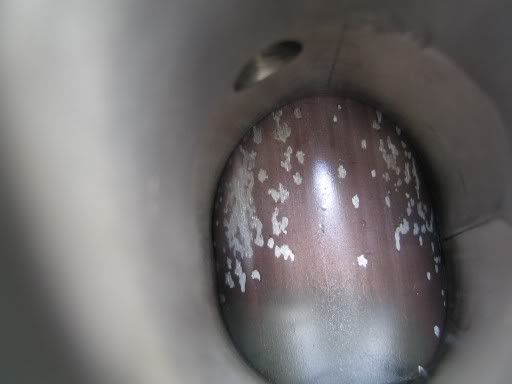
Loads of carbon and cylinder sludge has been splashing into the carbs due to the tight intake valves not sealing, this shot is the diaphragm carb.
IMG_0479512x384.jpg

Same cylinder side of the carbs but this shot is the throttle valve on the regular carb.
IMG_0480512x384.jpg

One of reasons to do your own repairs, I was told when I bought the bike in 2008 it had recently gone to a shop for carb work, instead of replacing the float bowl seal they used some kind of glop that hardened like cement and ruined the rubber seal.
IMG_0708512x384.jpg

IMG_0725a512x384.jpg

Top of diaphragm was pretty much spotless.
IMG_0742512x384.jpg

The underside of the diaphragm is only filtered by a course inline foam filter that works great for keeping the humming birds out, not so much the gritty fine stuff.
IMG_0744512x384.jpg

IMG_0745512x384.jpg

IMG_0746512x384.jpg

IMG_0747512x384.jpg

Lots of crud found in the regular carb top chamber, I'm sure some of this stuff finds it's way down the throttle valve and into the intake tract.
IMG_0764512x384.jpg

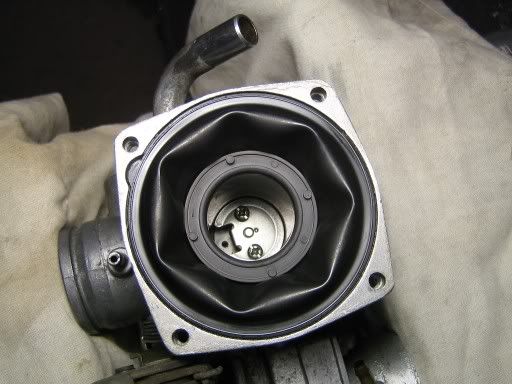
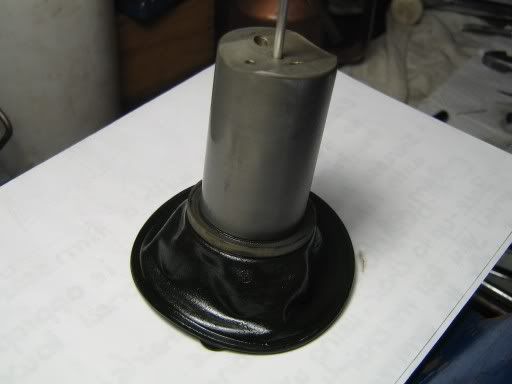
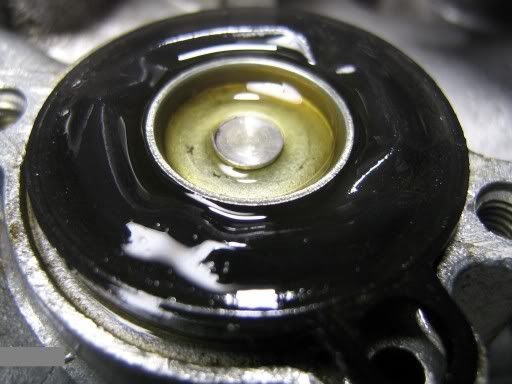
None of my manuals list this as anything more than a "Diaphragm Set" this is the top spring side, not sure if thats fuel or cleaning solvent.
IMG_0806c512x384.jpg

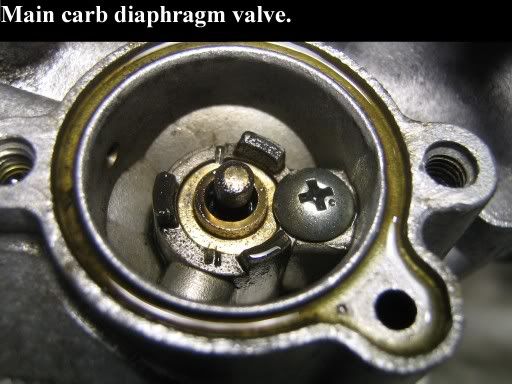
And where the diaphragm sits, would really like to know the proper name for this valve.
IMG_0808a512x384.jpg

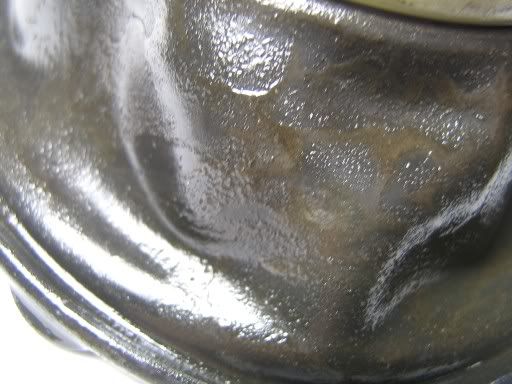
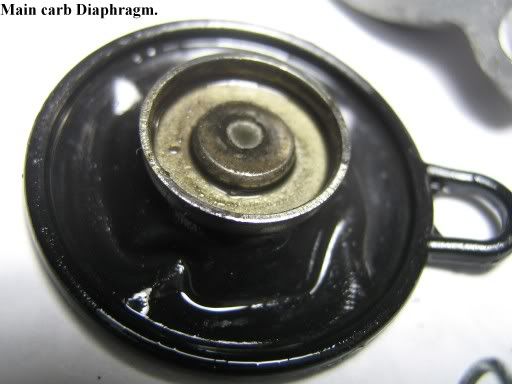
And the underside of the diaphragm that pushes on the brass pin.
IMG_0812a512x384.jpg
 

Sparkle

New member
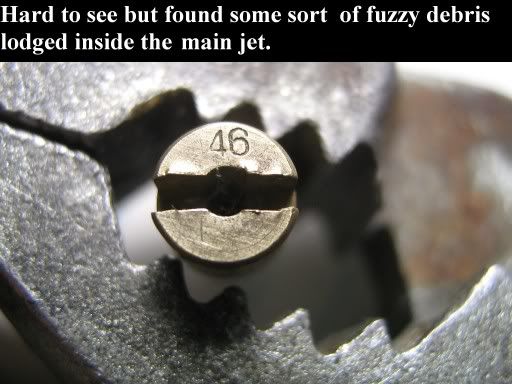
There wouldn't be much debris coming out of the intake valves to splash into the carbs and you can see the parts actually facing the valves are relatively clean. More likely scorched oil and carbon would be forced into the crankcase, blown up the crankcase vent and into the airbox and then through the carbs. This would make an oily mess but chances are the carbs are still okay if they were working okay before. Most of the oil and debris would be concentrated in the main air-flow passages and with some carb-cleaner you should be able to clean up the throttle plates and the main bores. The float bowls should only have normal residue and with the float bowls off, uscrew your jets and soak them in carb cleaner and blow them clean. Same goes for the float bowls..carb cleaner and wipe them clean. Chances are the carbs will be fine with cleaning.

You can make a float bowl gasket with a thin piece of gasket paper and using the bowl as a template....or you can use Permatex Bue silicone gasket maker...smear it lightly on the sealing surfaces of the bowl...let it harden for 1/2 hour and screw it together finger tight...a few hours later, snug it up.. A gasket is nicer if you think you have to remove it again later.

more guesses.

Sparkle
 

Shuswap

Member
There wouldn't be much debris coming out of the intake valves to splash into the carbs and you can see the parts actually facing the valves are relatively clean. More likely scorched oil and carbon would be forced into the crankcase, blown up the crankcase vent and into the airbox and then through the carbs. This would make an oily mess but chances are the carbs are still okay if they were working okay before. Most of the oil and debris would be concentrated in the main air-flow passages and with some carb-cleaner you should be able to clean up the throttle plates and the main bores. The float bowls should only have normal residue and with the float bowls off, uscrew your jets and soak them in carb cleaner and blow them clean. Same goes for the float bowls..carb cleaner and wipe them clean. Chances are the carbs will be fine with cleaning.

You can make a float bowl gasket with a thin piece of gasket paper and using the bowl as a template....or you can use Permatex Bue silicone gasket maker...smear it lightly on the sealing surfaces of the bowl...let it harden for 1/2 hour and screw it together finger tight...a few hours later, snug it up.. A gasket is nicer if you think you have to remove it again later.

more guesses.

Sparkle

+ 1 ....yet again

Pursang,
This engine truly needed a really good going-over. I'd clean the carbs thoroughly, clean everything...inspect(which I see you do in spades!!)

If you like the bike, this is an investment in future riding reliability....so be careful not to cut corners in too many places when it comes to engine re-assembly or choosing someone to do that portion for you.

Few things in life give the pleasure a well-running bike can at such reasonable cost, compared to other forms of recreation.
 
Last edited:

ScottM604

Super Moderator
I would like to put in my two cents. 1: take you time and do thing right 2: well you have it apart replace much as possible when it comes to seal / rubber parts like the intake boot and diagram in the carb.

I agree with every one else you need you top end done.

I word of warning I always hear stories of guys doing the top end then a short time later the bottom goes, so well the motor is out of the you should take care of it
 

pursang

New member
Thanks Sparkle, Shuswap and ScottM604.

My mechanical thinking must be out of whack, I was thinking if the intake valve clearance was so tight as to allow only 55lbs on a compression test, that one or both might be unseated, or maby just the one on the diaphragm carb side, so everytime the piston came up on compression with the exhaust valves closed the fuel charge would ignite and blow loose carbon past the valves and back into the carbs, that 2nd photo of the brass butterfly valve showing all the debris does face the intake valve.

Thanks you guys for all your expert advice, great ideas, and wisdom, your obviously a bunch of seasoned veterans with lots of experiance under your belts, I appreciate it, it also helps keep this old brain of mine from forgetting to many things.

Your right on the money, these old XT600s are good bikes, considering the condition of this engine I'm amazed how good it ran ! I only paid $ 1500 for it 3 years ago, I know it's worth at least $ 2500 so I don't mind putting money into it, especially knowing how great it's going to run when I'm done.

Thanks for your advice ScottM604, the engine is actually still in the frame, I did check the side clearance on the rod/crank and it's well within spec, so hopefully no problems with the bottom end.
 
Last edited:

Sparkle

New member
Hi pursang:

Nothing wrong with your thinking....they call it 'backfiring' when exploding mixture leaks through a partly open valve...usually it ignites the mixture in the carb runner and sometimes causes damage. In your case it could have less severe but your theory is a good as mine.

Sparkle
 

Bugsinteeth

New member
Hello Pursang,

I just responded to your camchain/timing thread. Then discovered this very cool rebuild thread!

I've recently done most of this stuff to my 1986 XT so will pipe up if I can be of any help. Sounds like some knowledgeable folks are already on the case.

Need to check in to DSBC more often to find these great pockets of info.

All the best

Bugs
 

pursang

New member
Thanks Bugs, I appreciate your post in the other thread too, especially since I don't have the usual manuals for this bike I need to get all the advice I can, I probably have 10 pdf manuals but most of them are in a foreign language or not very complete, my XT is a 1999 model, they stopped importing them into North America after 1995 so part numbers for the 99 don't exist in the U.S or Canada, luckiliy most of the U.S part numbers from 95 are matching up.
 
Top